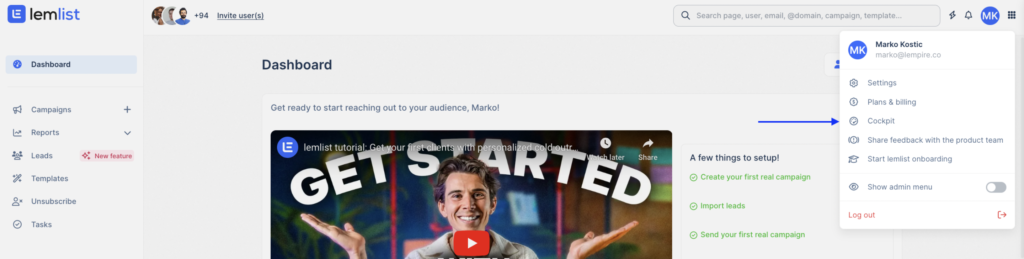
Invite and manage your team
Learn how to create a team, manage users, and adjust settings in lemlist for smooth collaboration.
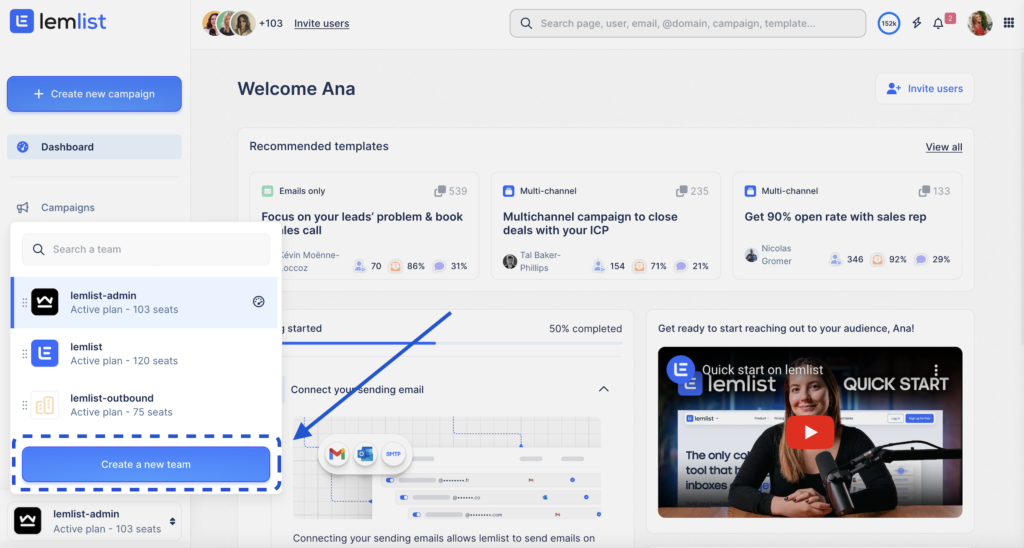
Create a new Team
To start collaborating, you need to create a team within your lemlist account.
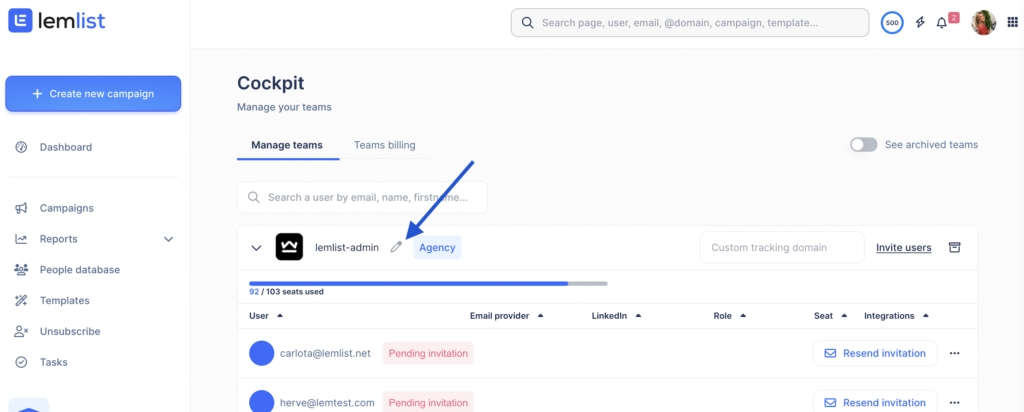
Managing Team Members: Adding and Removing Users
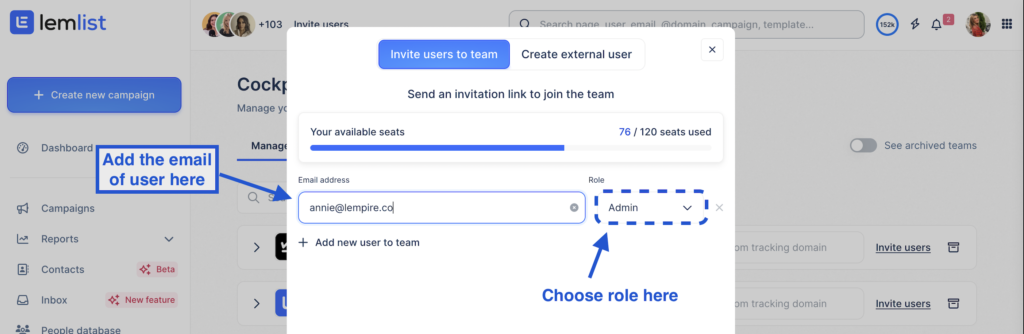
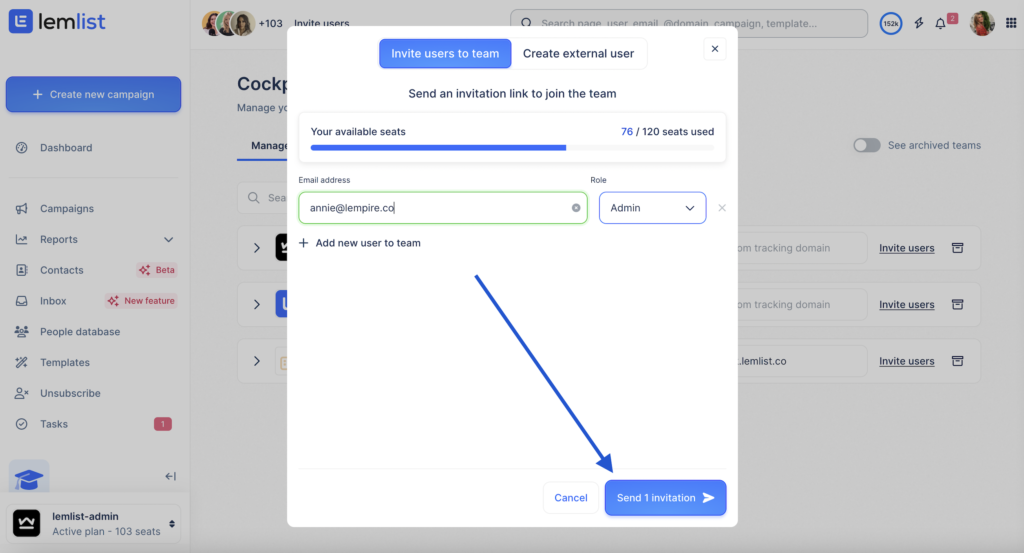
Invite Team Members
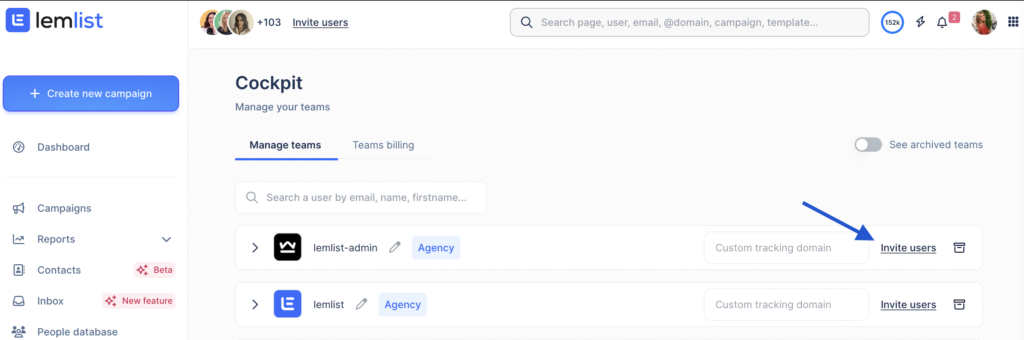
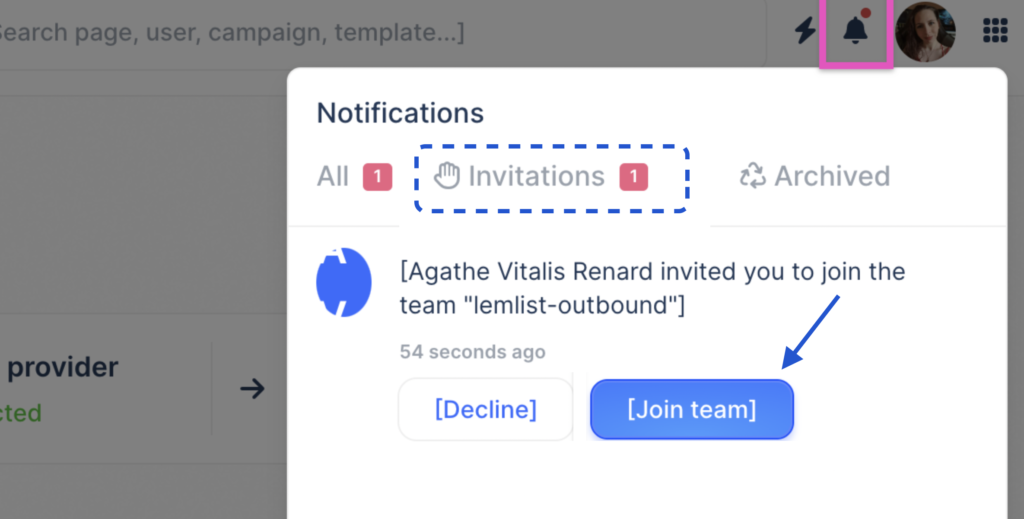
If they don’t have an account, they need to create one and then accept the invitation as described above.
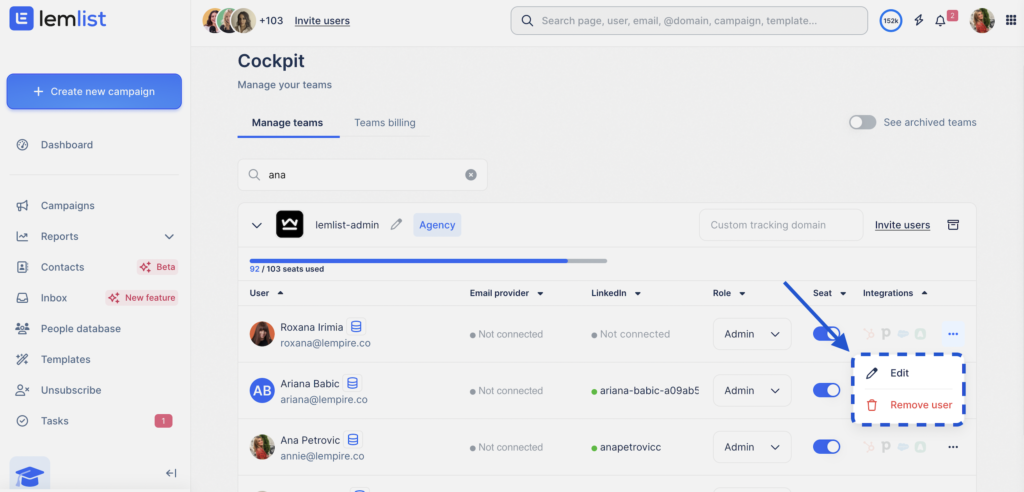
Remove Team Members
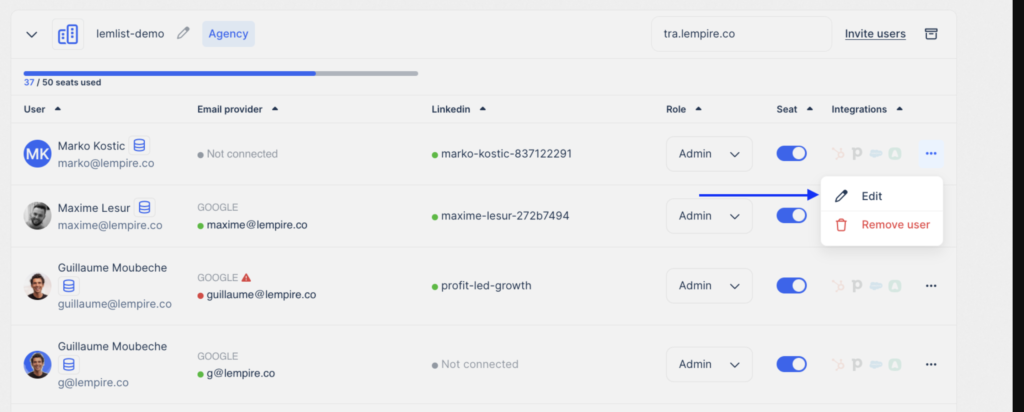
Manage user rights
Assigning roles ensures that team members have the right level of access
- Agency Roles: You can set different roles such as Admin, Manager, or Extern, each with specific permissions. Choose roles based on the tasks your team members will handle.
Roles and Associated Permissions
- Admin: Full access to all aspects of the accounts they are part of, with exclusive access to the cockpit menu.
- Member: Access to everything except the billing section. Members cannot invite or remove other users from the team, or change their own role or the role of others.
- Extern: Limited access; can only view their team’s account report if they were granted password-less login when invited.
Manage user account
You have the ability to edit various aspects of your team members’ settings in lemlist.
Here’s how you can change user settings and ensure everyone is set up for success, you can:
- Change user account details such as first name, last name, picture, and password.
- Set a specific custom tracking domain for individual users.
- Adjust the sending limits for each user.
- Edit their email signature.
*Please note that only Admins in lemlist have the authority to modify settings for other users.
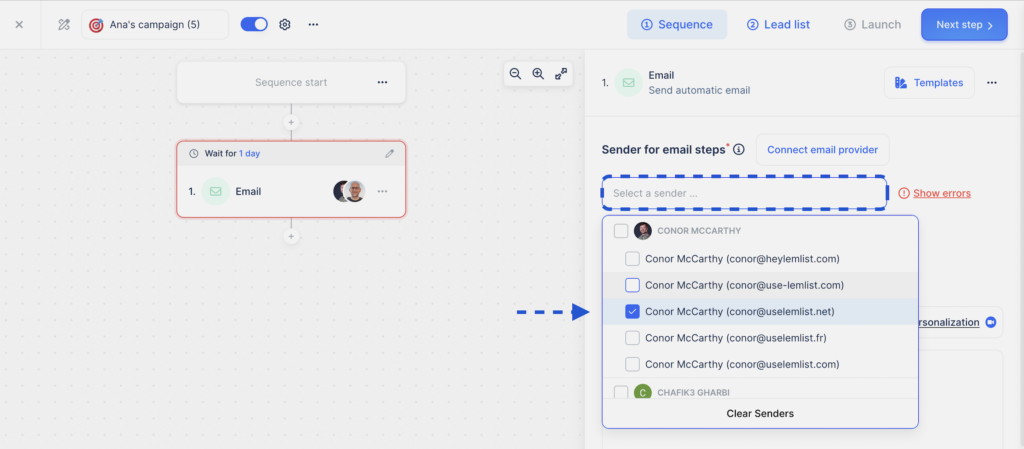
Send emails on behalf of someone else
When managing communications, you may find the need to send emails on behalf of a colleague or another person. This can enhance collaboration and ensure that messages appear to come from the appropriate source.
- Go to a campaign you have created.
- Go to the Sequence, and click on the option “Select a sender”
- Choose from all connected email providers: