Use custom variables
Custom variables help you personalize your email campaigns by adding specific details about your prospects. This creates tailored messages that feel personal and can improve both open and reply rates.
Default custom variables in lemlist
- {{email}}
- {{firstName}}
- {{lastName}}
- {{picture}}
- {{phone}}
- {{linkedinUrl}}
- {{companyName}}
- {{icebreaker}}
- {{sender.name}}
You can also create unlimited custom variables to make your campaigns even more personalized.
Important things to know
1
Case sensitivity: Custom variables are case-sensitive, so {{firstName}} and {{firstname}} are different.
2
CSV imports: When importing custom variables from a CSV, the variable name is exactly what appears in the first row of each column.
3
Correct formatting: Always ensure the braces around the variable are properly formatted.
- Correct: {{firstName}}
- Incorrect: {{ firstName }}
4
Character limit: Each custom variable should not exceed 2000 characters.
5
Fallback text: You can set fallback text for empty variables. Use this format: {{variable|fallback}}.
- Example: “Hello {{firstName|there}}”
- If “firstName” is missing, it will display: “Hello there”.
Variables can be more than text
Custom variables can include sentences or even images. To add an image as a variable, upload the image URL to your CSV.
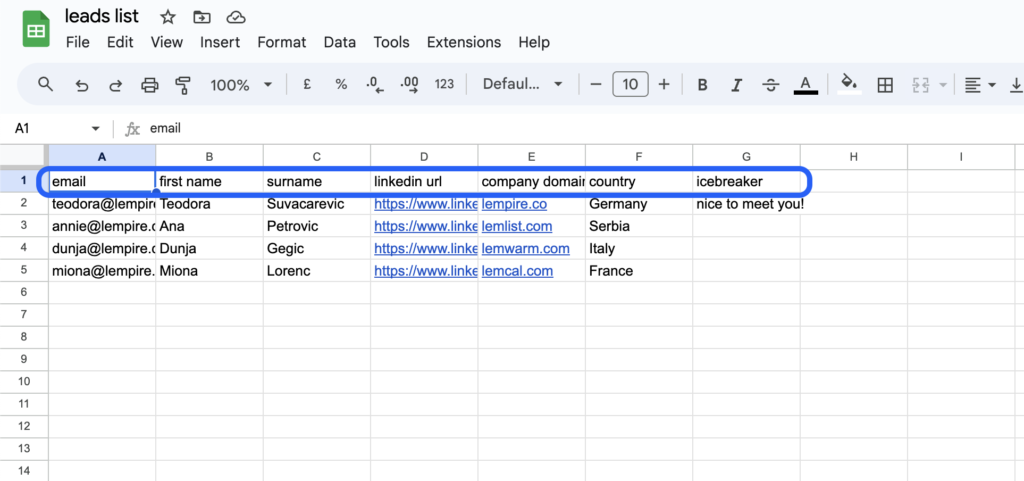
Creating custom variables from CSV imports
1
Ensure each custom variable has a column in your CSV with the correct content for each lead.
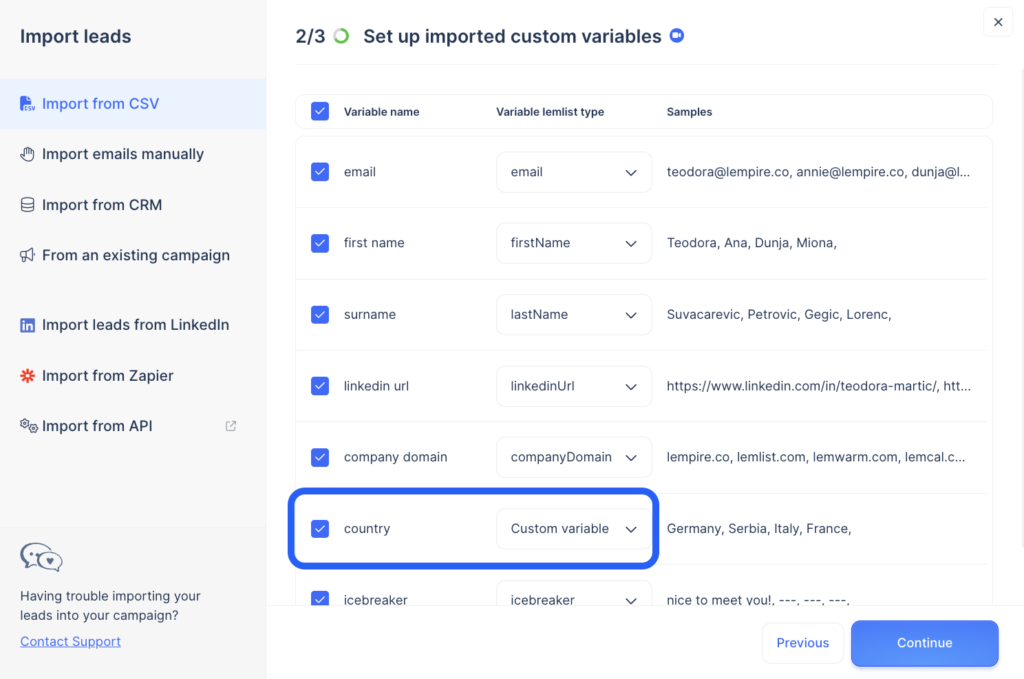
2
After importing the CSV, map the custom variables correctly. If the variable isn’t a default one, select “Custom variable”, and lemlist will create it based on your CSV column name.
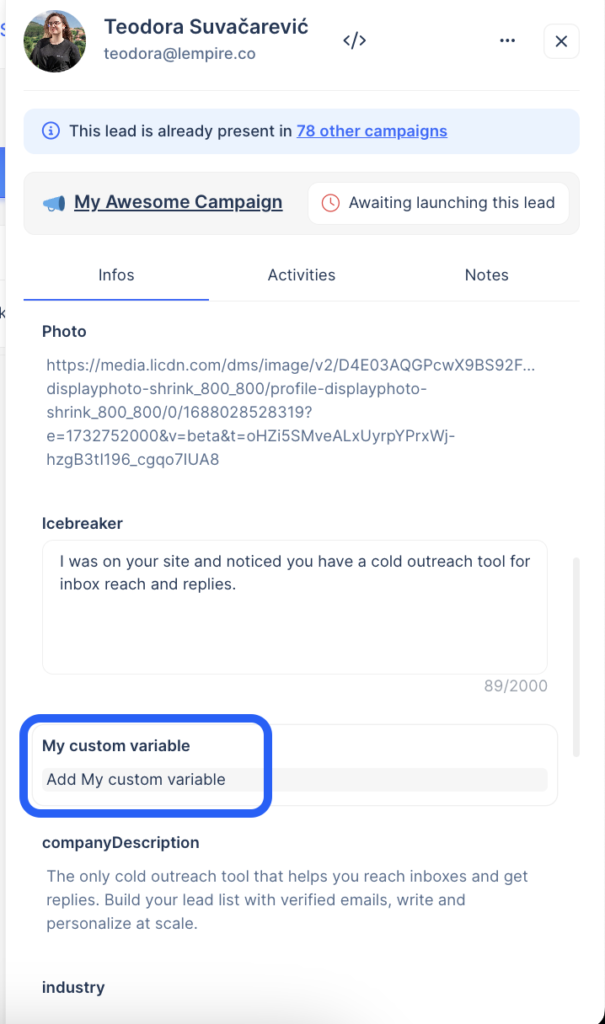
Create a custom variable manually
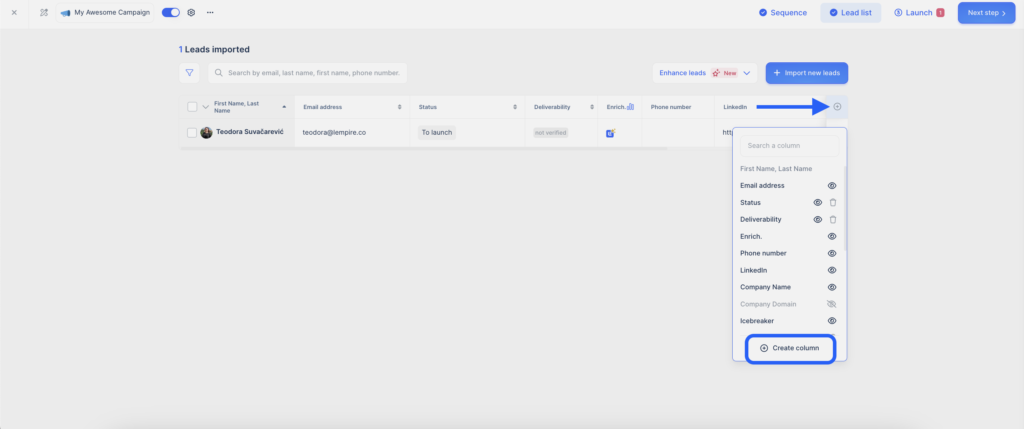
1
Go to your Leads list.
2
Click on the plus sign and select “Create column”.
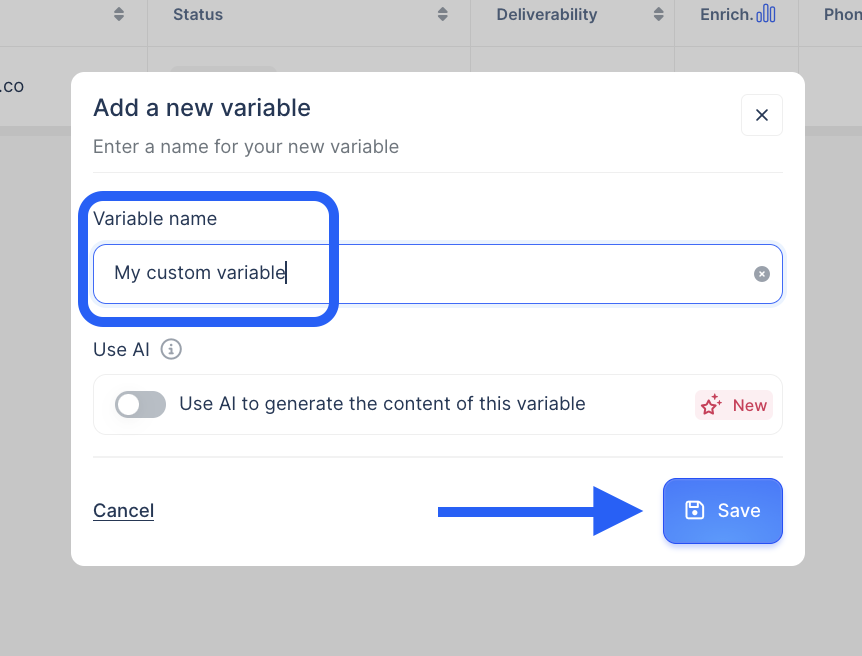
3
Enter the name of the new custom variable and click “Save”.
4
The new custom variable field will be visible in the lead’s info. Don’t forget to manually add content for each lead.
How useful was this lesson?

Copied