Share this lesson
Launch and review your leads
Once your campaign is ready and leads are imported, it’s time to launch. This will activate your campaign and lemlist will begin sending emails to your leads.
1
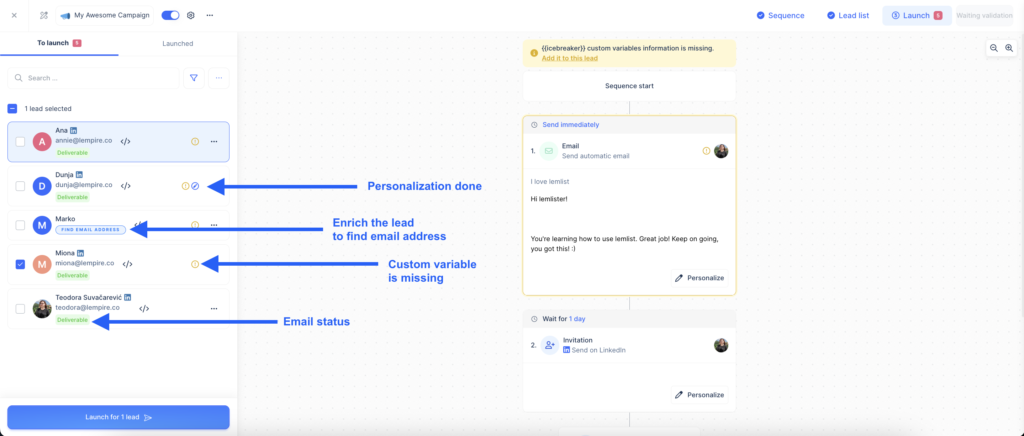
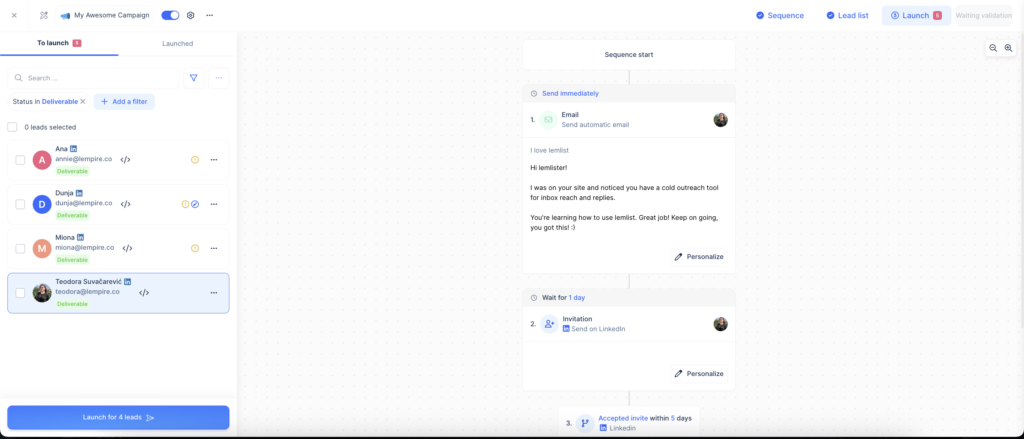
Go to the Launch section of your campaign.
2
Preview the sequence for each lead. Ensure all custom variables are correctly set up. Check if any custom variables are missing or if the lead has been personalized.
3
Review the email status for each lead (deliverable, risky, undeliverable, or unknown). If a lead is missing an email address, use the Email Finder to enrich the lead’s details.
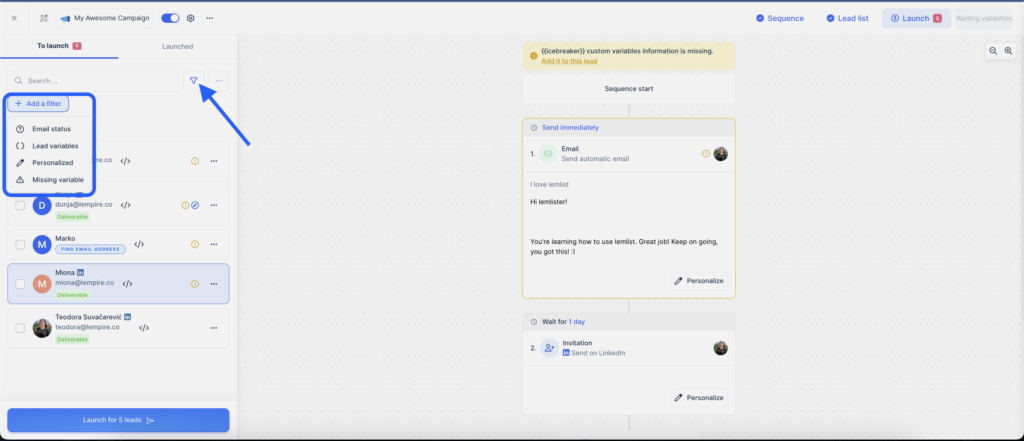
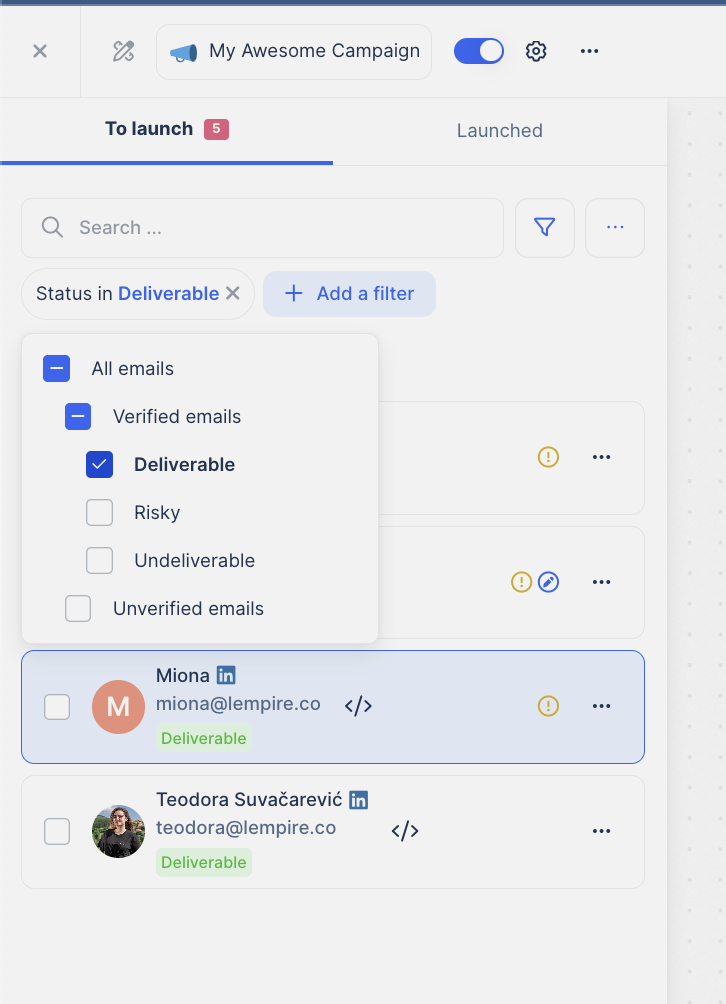
To target specific leads, add a filter. For example, you can filter only Deliverable email addresses.
5
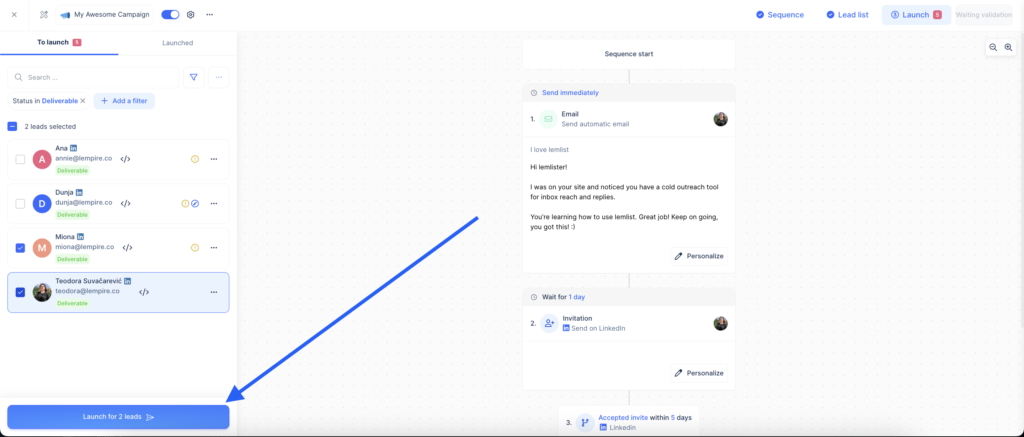
Select the leads you want to launch. If you choose all leads, they will be processed in batches of 100.
6
To launch the campaign for all leads, leave all leads unselected, then click on the Launch for X leads button.
7
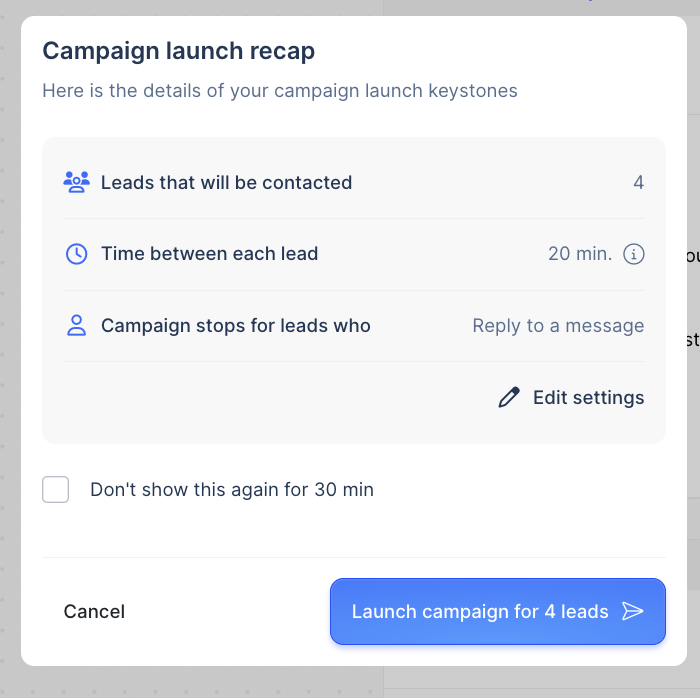
After selecting your leads, press Launch. A launch summary will appear, showing the number of leads that will be contacted, the time delay for the first step, and when the campaign will stop. You can also edit settings here.
8
Once you click Launch campaign for X leads, lemlist will start sending emails according to your campaign schedule and the sending algorithm.
How useful was this lesson?
I hate it
I love it
Share us your feedback
Quickly send a feedback on what you liked or disliked about this course.
It helps us a lot to improve our lemlist academy.
Lessons category
Create a campaign
Start now
Start now
Start now
Start now
Start now
Start now
Start now
Multichannel sequence with LinkedIn
Start now
Start now
Start now
Start now
Start now
Start now
Set up my campaign
Start now
Start now
Start now
Start now
Start now
Start now
Personalize
Start now
Start now
Start now
Start now
Start now
Start now
Start now
Start now
Start now
Import and manage leads
Start now
Review and launch my campaign
Start now
Start now
Start now
Manage a campaign
Start now
Copied